My craft room is full of wonderful things I am yet to use.. Time is my enemy here, but this Challenge by Simon Says Stamp gave me the perfect opportunity. I tend to use dark colours, but for this card I used lots of pink, red, orange & yellow. I also used my Tim Holtz tissue paper. that is always thought of but not used nearly often enough. I also coloured my Wendy Vecchi White Embossing Paste with Fired Brick Distress Ink and used the Zenspirations Mini Live Love Laugh Stencil by Crafters Workshop,
Firstly I ran my white cardstock & a sizzix embossing folder through my Big Shot Machine, then painted it with Dried Marigold, Spiced Marmalade & fired Brick Distress Paints, I then adhered the tissue paper with Claudine Hellmuths Studio multi medium - Matte in patches around the card base. I used the Numbered Stencil by Tim Holtz with White Gesso then partially coloured it with various Gelatos which I outlined with a Derwent Charcoal pencil. I used Black acrylic paint to stencil the flower, then used my embossing paste/distress ink mix for the words and the butterfly.
I stamped the flower heads using the My Favorite Things - Pretty Poppies Stamp set painted with Fired Brick and Spiced Marmalade Distress Paints. and stamped the Happy Birthday sentiment from the same stamp set. I randomly stamped the honeycomb image from the Tim Holtz Mixed Media stamp set.
I rolled the top corner and tore down one edge of the cardstock I inked around the card stock with Fired Brick & Black Soot Distress Inks. I then used another sadly neglected item, my Paper Stash.
I tore a strip of paper from Kaisercraft's Lulu & Roy 6X6 pad, then mounted it onto a craft card.
Wednesday, June 25, 2014
Monday, June 2, 2014
Take on the World
Back to what I love doing. No structure no theme, just playing. Eventually something just appears then you just keep adding.
I started using a technique fro CC1Compendium of Curiosity Vol 1 Scribble Stain Distress, page 34, which didn't turn out exactly as I wanted. but good enough to use as a background for my tag I stamped various Tim Holtz stamps using Wendy Vecchi Archival inks , Versafine Sepia ink & Ranger Archival Jet Black Ink pads I stamped various images from Different Tim Holtz stamps.
Because it started to take on a Journey theme, I went with it. I layered the tag onto Ranger/Tim Holtz Ideaology Kraft resist cardstock which I coloured using Distress Stain.
I finished off with Word Vellum quotes, Brads, Fragments and Word Charms. I ended up with a card that could be used for someone travelling, or someone who is starting a new phase of their life, or even a Birthday card for someone who is celebrating a milestone Birthday.
I started using a technique fro CC1Compendium of Curiosity Vol 1 Scribble Stain Distress, page 34, which didn't turn out exactly as I wanted. but good enough to use as a background for my tag I stamped various Tim Holtz stamps using Wendy Vecchi Archival inks , Versafine Sepia ink & Ranger Archival Jet Black Ink pads I stamped various images from Different Tim Holtz stamps.
Because it started to take on a Journey theme, I went with it. I layered the tag onto Ranger/Tim Holtz Ideaology Kraft resist cardstock which I coloured using Distress Stain.
I finished off with Word Vellum quotes, Brads, Fragments and Word Charms. I ended up with a card that could be used for someone travelling, or someone who is starting a new phase of their life, or even a Birthday card for someone who is celebrating a milestone Birthday.
hope you like it? please leave a comment to let me know what you think.
Monday, March 10, 2014
A Fishermans Card
My Partners eldest son is a keen fisherman, so for his birthday I made a card to suit his passion.
For the background I used The "Wrinkle-Free Distress" technique Tim Holtz taught in his Creative Chemistry 101 online class I used different blues and a green and of course a brown for the edges. I stamped the card with various old, old stamps which I found in my stamp collection both from Australian companies that are no longer in business. But fish stamps and shell stamps can be found easily on the web or eBay. I found a small piece of burlap which I frayed. I die cut a gate using the Memory Box Wrought Iron Gate , and leaf stem using Tim Holtz Spring Greenery Decorative Strip Die .
After the background was dry, I found some small circle stamps which can be found on many different stamp sets, mine were from a Scrappy Cat mini stamp set called "Everyday Assortment". I randomly stamped the circles to simulate bubbles. I found a rub-on set from Royal & Langnickel Brush Mfg called " Fishing Collage". and used a fish and a hook. I stamped the large fish onto a piece of scrap cardstock, cut it out, coloured it with a Blue Distress Marker and mounted it onto the background with foam dots.
I Layerd the Gate, Burlap piece, a piece of green string bag (used for Oranges), the leaf stem and the shell stamp together on the right hand side. I used Tim Holtz Distress Markers to colour the shells with Ranger Glossy Accents over the top. I used the Zig - Wink of Stella glitter brush tip marker on the large fish to make it stand out.
I had a wonderful time finding things I have had for ages in my craft room, including a dimensional sticker set from K&Company called "Fishing Journal Tags" I used the Kaisercraft Mini Alpha Stickers to write "Fishing you a Wonderful Birthday"
I mounted the whole thing onto some paper edged with brown Distress ink, then attached it to a 5 1/2 X 4 1/4 card base. I thought I would go for a printed card base, so used a 12 X 12 DCWV stack called "Collage Musings" It is a fabulous stack, but I am not sure if it is still available?
Here are another couple of pictures in close up, and thanks for taking a look at my blog.
For the background I used The "Wrinkle-Free Distress" technique Tim Holtz taught in his Creative Chemistry 101 online class I used different blues and a green and of course a brown for the edges. I stamped the card with various old, old stamps which I found in my stamp collection both from Australian companies that are no longer in business. But fish stamps and shell stamps can be found easily on the web or eBay. I found a small piece of burlap which I frayed. I die cut a gate using the Memory Box Wrought Iron Gate , and leaf stem using Tim Holtz Spring Greenery Decorative Strip Die .
After the background was dry, I found some small circle stamps which can be found on many different stamp sets, mine were from a Scrappy Cat mini stamp set called "Everyday Assortment". I randomly stamped the circles to simulate bubbles. I found a rub-on set from Royal & Langnickel Brush Mfg called " Fishing Collage". and used a fish and a hook. I stamped the large fish onto a piece of scrap cardstock, cut it out, coloured it with a Blue Distress Marker and mounted it onto the background with foam dots.
I Layerd the Gate, Burlap piece, a piece of green string bag (used for Oranges), the leaf stem and the shell stamp together on the right hand side. I used Tim Holtz Distress Markers to colour the shells with Ranger Glossy Accents over the top. I used the Zig - Wink of Stella glitter brush tip marker on the large fish to make it stand out.
I had a wonderful time finding things I have had for ages in my craft room, including a dimensional sticker set from K&Company called "Fishing Journal Tags" I used the Kaisercraft Mini Alpha Stickers to write "Fishing you a Wonderful Birthday"
I mounted the whole thing onto some paper edged with brown Distress ink, then attached it to a 5 1/2 X 4 1/4 card base. I thought I would go for a printed card base, so used a 12 X 12 DCWV stack called "Collage Musings" It is a fabulous stack, but I am not sure if it is still available?
Here are another couple of pictures in close up, and thanks for taking a look at my blog.
Monday, January 20, 2014
Christmas 2013
I can't believe Christmas is over and done with! it is January 20 2014 and we have just finished the most horrendous week of 40 degrees Celsius plus. I don't have air conditioning so I became a big blimp on the couch under the ceiling fan.
My 82 year old mum was with me on and off from November, and over Christmas. She only went home to Queensland last Wednesday.
I haven't blogged since last August!!!!!! my how time flies. I have had computer troubles and in my family everyone has Birthdays from August right through to November. Of course I left my Christmas card making until the last minute again. Up until all hours of the night trying to finish the 50 odd cards I had to make. Horror of all horrors, I didn't make it and had to buy a pack of cards to send to people 4 days before Christmas.
anyway I saw a technique on the Sizzix blog by Anna Karin called Gessso Dry Embossing. You can also see her tutorial on Layersofink.blogspot.com. It was a fun technique, and if your gesso and emboss them all together it is quite quick when you have a few cards to make.
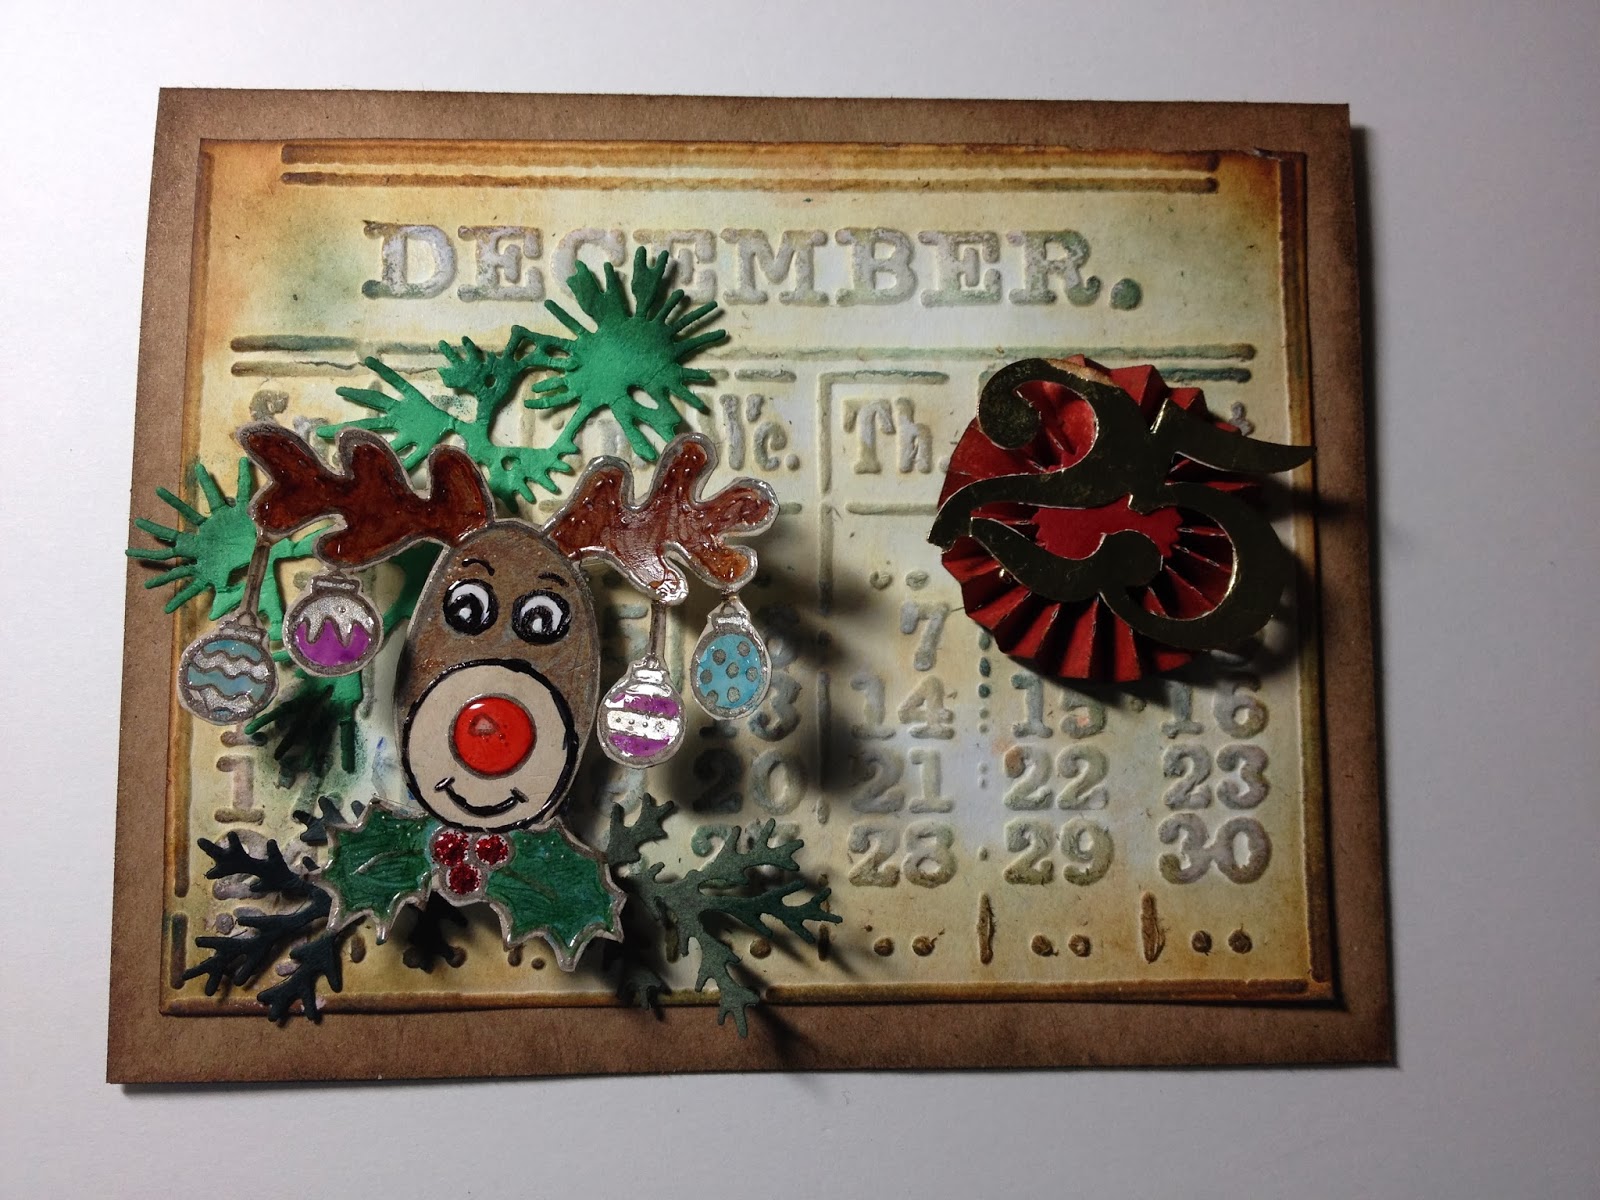
Anyway here are a few of my Christmas Cards.
These two have Action Wobblers to make Santa and Rudolf move.
Most of the cards use Tim Holtz distress Products , Tim Holtz/Sizzix Bigz Dies and Decorative Strip Dies
Well better late than never. I hope you all have a wonderful 2014.
Anyway here are a few of my Christmas Cards.
These two have Action Wobblers to make Santa and Rudolf move.
Most of the cards use Tim Holtz distress Products , Tim Holtz/Sizzix Bigz Dies and Decorative Strip Dies
Well better late than never. I hope you all have a wonderful 2014.
Wednesday, June 26, 2013
Balloon Girl
I really love the colours in this card. Sort of like a sunset.
I used various distress inks,
7 Gypsies "off the wall" 8x8 paper pad.
Tim Holtz Die - hardware findings,
Movers & Shapers - styled labels & key holes.
On the edge - Distressed Doily
Tim Holtz stamp - Life is what happens....
My Minds Eye - Miss Caroline Fiddlesticks 6X6 paper pad
I used various distress inks,
7 Gypsies "off the wall" 8x8 paper pad.
Tim Holtz Die - hardware findings,
Movers & Shapers - styled labels & key holes.
On the edge - Distressed Doily
Tim Holtz stamp - Life is what happens....
My Minds Eye - Miss Caroline Fiddlesticks 6X6 paper pad
Saturday, May 25, 2013
Simon Say's Stamp Favourite Ink Challenge
What is my favourite ink??? Like Anita Houston - The Artful Maven Haven said on her blog "I sure can't pick which one I like best" I too struggle with choosing just one ink, I think my ink favourite type of ink would have to be distress inks. But then I also love creating fun cards with Hero Arts Shadow Inks as well. But for this Challenge, The two inks I couldn't decide between were Tim Holtz Distress Inks Fired Brick and Vintage Photo so I made two cards using a different ink for each one. The stamped images were stamped with Black Archival Ink, another of my favourites, and I used a little smidge of Picket Fence Distress Stain on both cards, other than that only one ink and the matching distress stain were used for both cards.
The first one used Fired Brick: Embrace Imperfection
The second card used Vintage Photo: Time
I could have made more as there are so many inks I love, but I have to stop somewhere!!! hope you like them.
The first one used Fired Brick: Embrace Imperfection
The card base is kraft cardstock. The stamps are all Tim Holtz/Stampers Anonymous stamps, Urban Tapestry, Butterflies & Moths and Life is What Happens ..... I put a strip of Tim Holtz Ideaology - Tissue Tape - Sketchbook down one side I fussy cut the Butterflies and Moths stamp and used some black jewelery wire for the antenna on the top butterfly. I coated the wings with Clear Rock Candy Stickles. I cut two file tabs from Tim's/Sizzix On The Edge - File Tabs Die and used the words Embrace & Imperfection from the Idea-ology Chit Chat stickers pad. I finished off by mounting the whole thing onto black card stock before foam mounting onto the kraft cardstock.
Again the base is Kraft card stock. I used the Tim Holtz/Stampers Anonymous Pen & Pencil Stamp Set I pierced holes on one side and inserted eyelets. then tied some twine through each eyelet. I affixed the 1/2 from the Idea-ology Numerals Metal Hardware with some Long Fastners. I cut two clocks from a sheet from the Idea-ology Kraft Resist 12X12 stash I put two Metal Game Spinners onto one of the clocks. mounted everything onto another piece of Kraft Resist from the same stash. then foam mounted the whole thing onto the Kraft card stock. I distressed the card stock and inked around the edges with Vintage photo of course.
I could have made more as there are so many inks I love, but I have to stop somewhere!!! hope you like them.
Monday, May 20, 2013
Giggle
There never seems to be enough time in the working week to play in my craft room. I managed to put this one together over a couple of days using my new Tim Holtz Dies and some old favourite stamps
I used Tim's Reverse Damask stamp. I inked the stamp with Forest Moss, Peeled Paint and Crushed Olive Distress Stain. placed a piece of Hero Arts Watercolour Paper over the stamp and pressed over the inked stamp to get a clear impression. I inked around the edges firstly with Forest Moss Distress Ink then with Vintage Photo Distress Ink. I then used the Torn Notebook - On the Edge Die and adhered to some green card stock inked with Vintage Photo Distress Ink. I stamped the word giggle using black Archival Ink.
I Die Cut some Brown Card stock with my new favourite Mini Clipboard Movers & Shapers Die Then distressed it using my Tim Holtz Sanding Grip.
I stamped the little girl from Tim's "The Girls" Stamp set by Stampers Anonymous using Ranger Black Archival Ink onto Ranger Specialty Stamping Paper and coloured with various Distress Markers. I placed the picture into the mini clipboard and foam mounted it onto the Reverse Damask inked image.
I adhered a wing from the Idea-ology range and added some clear gems
I loved making this card. now to find some more hours in the day to play some more!!!!
Thursday, May 16, 2013
The Birdman
Love this Tim Holtz/Stampers Anonymous Pen and Pencil set, particularly the Birdman. I would hate to see the top of his head though??? eewww! I coloured him in with distress markers, fussy cut him out put foam adhesive on the back.
I embossed the card stock with with the Tim Holtz/Sizzix Gears Texture Fade then distressed the edges and around the card with Walnut stain Distress ink. I tore some paper from the Ideaology - Collage Paper Stash. and distressed it as well. I adhered the paper to the card stock and mounted the Birdman on top.
I cut two sets of metallic card stock with the "Steampunk- on the edge" Movers and Shapers Die, and foam mounted them down one side. I cut a Tattered Banner and used a combination of Ideaology chit chat words and Kaisercraft Tiny alpha stickers to complete the card.
The saying is so true, "A new idea is delicate, it can be killed by a sneer or a yawn"
Sunday, April 28, 2013
4 Children's Birthday Cards
Hi there,
Since returning from Thailand mid March, my mum has been down from Queensland and has spent a few weeks with me, so blogging has been set aside. She is 81 so I like to spend as much time with her when she is with me as possible. She did ask me while she was with me to make some cards for her step grandchildren up in Mackay Qld. Thomas is 8 Jack 11, Jamie is 10 and Bethany 7. these are the cards I came up with.
I used two stamp sets that were free with magazines the fairy & bluebirds came with an Australian magazine, Australian Simply Cards this set was exclusively designed for the magazine, and is from Whimsy Stamps - Wee Collection., The bow, butterfly and ladybugs, came from a set called Country Companions - Sunshine Meadows available from Docrafts with the UK magazine, Papercraft Inspirations.I stamped the images and fussy cut them, then coloured them using Tim Holtz Distress Markers. The distress markers were used with water on her skin, but the wings and her hair were just used as markers. I cut the number seven from an Authentique - Delightful patterned paper collection. and mounted all the pieces onto another piece of the same paper pad. I used Ranger Glossy Accents to accentuate the hair, wings, bow, birds and the butterfly. I then mounted this onto a piece of pink cardstock, which was then mounted onto some white cardstock.
This was stamped using stamps from the local discount store "Sam's Warehouse" the Robot and stars were stamped using a stamp set from SweetHearts from Hunter Leisure. The writing also came from an alphabet set from Hunter Leisure. The writing was stamped using Collections Ink by Julie Van Oosten called Midnight Blue, the Robots were stamped using Ranger Archival Ink - French Ultramarine, the two lines were stamped using Hero Arts Butter Bar Mid-tone ink and Wplus9 - Country Charm stamp set. The number 8 was cut from Kaisercraft cock-a-doodle-do paper pad. as were some of the stars. Some of the stars were stamped from the same stamp set as the robots the rest were cut using the Simon Says Stamp Holiday Shapes die. I used glossy accents to bring out the stars, and the robot's eyes & heart were accentuated by Ranger White glossy accents. to finish off I used some tape measure Washi tape.
I embossed White cardstock with Tim Holtz - Sizzix Harlequin texture fade. then gently wiped over Tim Holtz Dusty Concord Distress Ink. I die cut some white cardstock using Impress Bloom Nesting Die and edged it with Dusty Concord Distress Marker. I cut a strip on paper from Kaisercraft La-Di-Da Paper pad. I stamped HouseMouse Mudpie Munch using memento Tuxedo black ink and coloured using Derwent Inktense Pencils I foam mounted the die cut mouse onto the paper strip.
This final card is my favourite. I started off with white cardstock. I coloured it using Tim Holtz Vintage Photo, Peeled Paint and Spiced Marmalade Distress Paint. I washed over the whole card with Scattered Straw and Crushed Olive Distress Stains.Then I swiped a strip of Tim Holtz Vintage Photo Distress Crackle Paint across the middle. The number 11 was cut from Memory Box Blackbird paper pad. I stamped the tree in Ranger Archival - Jet Black Ink. using Tim Holtz/Stampers Anonymous Life Adventure Stamp set. the Cougar was stamped in Archival ink and coloured with Derwent Inktense Pencils. I assembled the Cougar so that he looks like he is jumping between the numbers. I mounted the whole thing onto brown cardstock.
Well that's the 4 Birthday cards. Hope you like them.
Since returning from Thailand mid March, my mum has been down from Queensland and has spent a few weeks with me, so blogging has been set aside. She is 81 so I like to spend as much time with her when she is with me as possible. She did ask me while she was with me to make some cards for her step grandchildren up in Mackay Qld. Thomas is 8 Jack 11, Jamie is 10 and Bethany 7. these are the cards I came up with.
I used two stamp sets that were free with magazines the fairy & bluebirds came with an Australian magazine, Australian Simply Cards this set was exclusively designed for the magazine, and is from Whimsy Stamps - Wee Collection., The bow, butterfly and ladybugs, came from a set called Country Companions - Sunshine Meadows available from Docrafts with the UK magazine, Papercraft Inspirations.I stamped the images and fussy cut them, then coloured them using Tim Holtz Distress Markers. The distress markers were used with water on her skin, but the wings and her hair were just used as markers. I cut the number seven from an Authentique - Delightful patterned paper collection. and mounted all the pieces onto another piece of the same paper pad. I used Ranger Glossy Accents to accentuate the hair, wings, bow, birds and the butterfly. I then mounted this onto a piece of pink cardstock, which was then mounted onto some white cardstock.
This was stamped using stamps from the local discount store "Sam's Warehouse" the Robot and stars were stamped using a stamp set from SweetHearts from Hunter Leisure. The writing also came from an alphabet set from Hunter Leisure. The writing was stamped using Collections Ink by Julie Van Oosten called Midnight Blue, the Robots were stamped using Ranger Archival Ink - French Ultramarine, the two lines were stamped using Hero Arts Butter Bar Mid-tone ink and Wplus9 - Country Charm stamp set. The number 8 was cut from Kaisercraft cock-a-doodle-do paper pad. as were some of the stars. Some of the stars were stamped from the same stamp set as the robots the rest were cut using the Simon Says Stamp Holiday Shapes die. I used glossy accents to bring out the stars, and the robot's eyes & heart were accentuated by Ranger White glossy accents. to finish off I used some tape measure Washi tape.
I embossed White cardstock with Tim Holtz - Sizzix Harlequin texture fade. then gently wiped over Tim Holtz Dusty Concord Distress Ink. I die cut some white cardstock using Impress Bloom Nesting Die and edged it with Dusty Concord Distress Marker. I cut a strip on paper from Kaisercraft La-Di-Da Paper pad. I stamped HouseMouse Mudpie Munch using memento Tuxedo black ink and coloured using Derwent Inktense Pencils I foam mounted the die cut mouse onto the paper strip.
This final card is my favourite. I started off with white cardstock. I coloured it using Tim Holtz Vintage Photo, Peeled Paint and Spiced Marmalade Distress Paint. I washed over the whole card with Scattered Straw and Crushed Olive Distress Stains.Then I swiped a strip of Tim Holtz Vintage Photo Distress Crackle Paint across the middle. The number 11 was cut from Memory Box Blackbird paper pad. I stamped the tree in Ranger Archival - Jet Black Ink. using Tim Holtz/Stampers Anonymous Life Adventure Stamp set. the Cougar was stamped in Archival ink and coloured with Derwent Inktense Pencils. I assembled the Cougar so that he looks like he is jumping between the numbers. I mounted the whole thing onto brown cardstock.
Well that's the 4 Birthday cards. Hope you like them.
Wednesday, February 20, 2013
The Old Jalopy
This is one of my favourite Tim holtz dies. The car was cut from bright blue cardstock, which I distressed with Black Soot ink and Brushed Pewter & Picket Fence Distress Stain. I die cut the panels in Grey cardstock and distressed with Black Soot. Although you can't see it in this picture I cut some acetate and placed behind the windows for the glass. I used the Tim Holtz Subway Stencil on a copper pearl cardstock which I distressed with a sanding block then rubbed with Picket Fence Distress Stain. Finished off with a folded inked Journalling ticket and some Ideology bits all from Mr T.
Sunday, January 27, 2013
Australia Day
Saturday 26th January is Australia Day, or in Aussie slang "straya day" so to all you Aussies out there "Happy Australia Day". I haven't made anything new, but thought I would post a couple of tags I made for Tim Holtz and Mario Rossi, as a thankyou, and as a token to remember their visit by.
The first two are the back and front of the tag for Mario
The bottom two are the back and front of the tag for Tim
Monday, January 21, 2013
Life
Most times when I make a card, I follow a story line, This card is about Life passing so quickly, I am now 55 years old, but still feel like a young girl, There is so much to do, so many things to enjoy. The numbers signify time passing and the Bird and leaves the seasons passing.
Tim Holtz :-
Distress Inks - Salty Ocean, Mowed Lawn, Squeezed Lemonade, Pine Needles, Gathered Twigs and Vintage Photo
Distress Inks: Antique Linen, Iced Spruce, Picket Fence
Stamps: Bird from Urban Tapestry, Numbers from The Countdown
Bigz Die: Tattered Leaves
Alterations Texture Fade: Textured Leaves Set
Tim Holtz/Stampers anonymous Life is what Happens ........ Stamp
Ideology Tissue Wrap - Terminology, Paper Clip & Word Bands
Ranger
Inks: Archival - Viridian & Adirondak - stream
Perfect Pearls Mist - Dylusions - Black Magic Spray Ink.
Claudine Helmuth: Studio Multi-medium Matte
Hero Arts:
Florentine Scroll Background
Hero Hues Watercolor Paper
Crafters Warehouse: 6X6 Mini Numerals Template
My Minds Eye: Totally Girl 2009 12X12 Paper stash
Heidi Swapp: Paper Distresser
Glue Arts: Glue Glide Pro
Stix To Anything foam dots
Sookwang Double sided tape.
Dark Grey Cardstock
Natural Twine
Products used:
Tim Holtz :-
Distress Inks - Salty Ocean, Mowed Lawn, Squeezed Lemonade, Pine Needles, Gathered Twigs and Vintage Photo
Distress Inks: Antique Linen, Iced Spruce, Picket Fence
Stamps: Bird from Urban Tapestry, Numbers from The Countdown
Bigz Die: Tattered Leaves
Alterations Texture Fade: Textured Leaves Set
Tim Holtz/Stampers anonymous Life is what Happens ........ Stamp
Ideology Tissue Wrap - Terminology, Paper Clip & Word Bands
Ranger
Inks: Archival - Viridian & Adirondak - stream
Perfect Pearls Mist - Dylusions - Black Magic Spray Ink.
Claudine Helmuth: Studio Multi-medium Matte
Hero Arts:
Florentine Scroll Background
Hero Hues Watercolor Paper
Crafters Warehouse: 6X6 Mini Numerals Template
My Minds Eye: Totally Girl 2009 12X12 Paper stash
Heidi Swapp: Paper Distresser
Glue Arts: Glue Glide Pro
Stix To Anything foam dots
Sookwang Double sided tape.
Dark Grey Cardstock
Natural Twine
Thursday, January 3, 2013
Birthday Card for Tim Holtz
Happy New Year everyone, I hope 2013 brings you all happiness, love, laughter and good health.Today is a hot one in Melbourne, Australia and it is hard to imagine how cold it must be in the Northern Hemisphere. After looking at all the beautiful snow pictures taken by the crafters I follow on Twitter, it must be freezing!! This card is one I have made to celebrate the amazing Mr T's birthday. (Holtz that is).The inspirational crafter/photographer @Linda Ledbetter from @ www.studioL3.com has offered a challenge in her finale of the Compendium of Curiositiesn Challenge, to make Tim a card for his Birthday on 7th January, with the chance to win an autographed rare apron. My card tells the story of an amazing man who inspires everyone to journey into their own creativity. The umbrella man in my eyes is Tim. Particularly after his visit to Melbourne in 2012 when he was snapped by the one and only Mario Rossi walking down a rainy Melbourne street carry his black umbrella.
I have used mostly Tim Holtz and Ranger products except for the "Happy Birthday" stamp and various cardstock and paper. Hope you like it
Friday, September 7, 2012
Monday, July 30, 2012
Tim Holtz inspired Cards
These two cards are inspired by my favourite crafter Tim Holtz. I just adore the distressed/ Vintage look and can't get enough of the distress inks. I now have every distress pad except for the new summer seasonal pads, I had them on order from Simon Says Stamp along with the Re Inkers and their fabulous June card kit. and for the first time ever they never made it to me. I bet someone out there is really enjoying using them Grrr. Oh well on the up side, it may inspire someone to start crafting who knows?
Thursday, July 12, 2012
Time Flies
Well it,s been a long time between posts. I don't need to tell most of you how hard it is to find time to do the things you love. Recently met the one and only Tim Holtz and Mario while they were in Melbourne, I was lucky enough to attend one of his Artful Flight classes. It was fantastic..
My eldest son is getting married to the lovely Katie in 4 weeks in Palm Cove, Northern Queensland. It has come around so quickly. I hope it stops raining up there for the Wedding??
Here is the card I have made for them.
I have used Mauve DCWV pastels cardstock for the card, Sandylions papers Silver Splash & Wedding Words. Hero Arts Circle Lace stamp, Oxford Impressions Bride & Groom from the Beloved set and underneath this are the words "Two hearts beat as one" from the Kaisercraft Mini Clear Stamps "Wedding" set.
I stamped directly onto the Wedding Words paper with Tsukineko Versafine Imperial Purple for the bride & Groom and two hearts, and Versamark and Stampendous Detail White embossing powder for the lace.
The edges of the Wedding Words paper were torn and rolled over on one corner, then inked with Tea Dye Distress Ink.
I also used this ink around the Upstairs Down Stairs cream felt frame from Ruby Rock-It.
I placed a Purple Diamante Heart from Fimpress on the brides veil, attached a Mix It heart shaped buckle to an odd peice of cream ribbon and attached it with Ranger Wondertape.
The All Because Two People Fell in Love chipboard sentiment from Kaisercraft was first inked with Dusty Concord Distress Ink, then stamped with Versamark and embossed with Allison Ellis Venus Violet and Ranger Embossing Tinsel. It was attached using Ranger Glossy Accents.
Hope you like it.
My eldest son is getting married to the lovely Katie in 4 weeks in Palm Cove, Northern Queensland. It has come around so quickly. I hope it stops raining up there for the Wedding??
Here is the card I have made for them.
I have used Mauve DCWV pastels cardstock for the card, Sandylions papers Silver Splash & Wedding Words. Hero Arts Circle Lace stamp, Oxford Impressions Bride & Groom from the Beloved set and underneath this are the words "Two hearts beat as one" from the Kaisercraft Mini Clear Stamps "Wedding" set.
I stamped directly onto the Wedding Words paper with Tsukineko Versafine Imperial Purple for the bride & Groom and two hearts, and Versamark and Stampendous Detail White embossing powder for the lace.
The edges of the Wedding Words paper were torn and rolled over on one corner, then inked with Tea Dye Distress Ink.
I also used this ink around the Upstairs Down Stairs cream felt frame from Ruby Rock-It.
I placed a Purple Diamante Heart from Fimpress on the brides veil, attached a Mix It heart shaped buckle to an odd peice of cream ribbon and attached it with Ranger Wondertape.
The All Because Two People Fell in Love chipboard sentiment from Kaisercraft was first inked with Dusty Concord Distress Ink, then stamped with Versamark and embossed with Allison Ellis Venus Violet and Ranger Embossing Tinsel. It was attached using Ranger Glossy Accents.
Hope you like it.
Subscribe to:
Posts (Atom)